The Exposure Triangle: What is it?
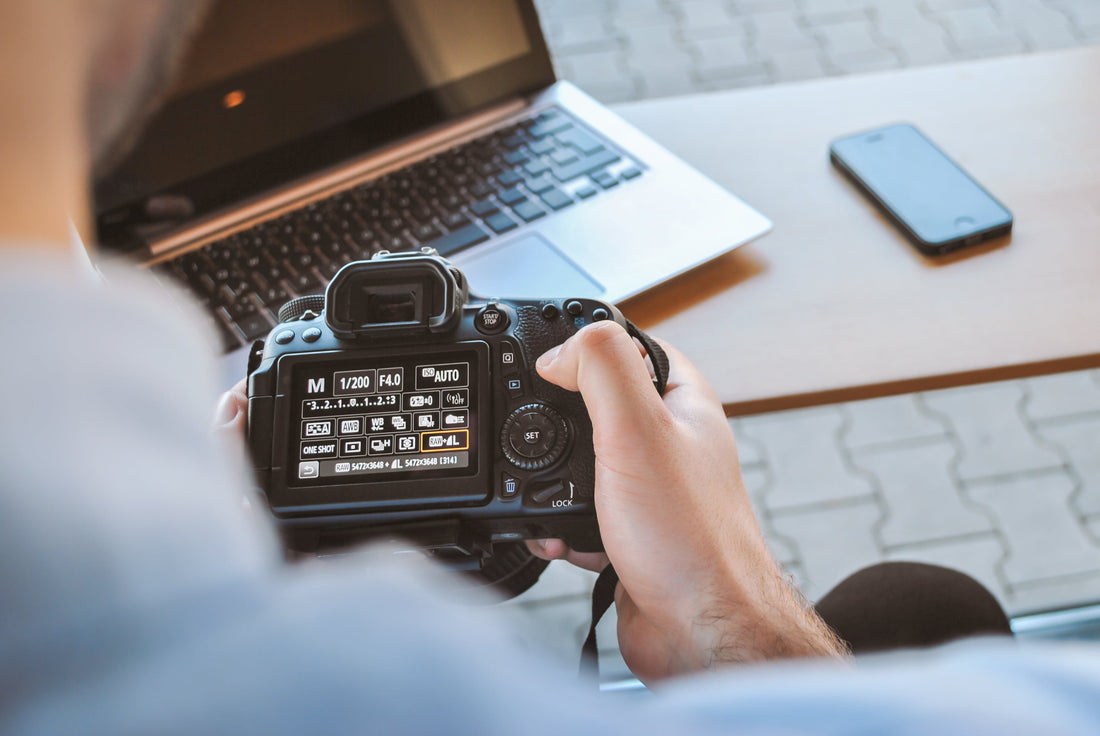
Understanding exposure is crucial for capturing well-lit and visually appealing photographs. At the heart of mastering exposure lies the Exposure Triangle—a concept that brings together three fundamental elements: aperture, shutter speed, and ISO. Let's break down each component and explore how they interact to create the perfect exposure. As you read, refer to the graphic above.
1. Aperture: The Eye of the Lens
Aperture refers to the opening in the lens through which light enters the camera. It is measured in f-stops, with smaller f-stop numbers indicating larger apertures and vice versa.
-
Real-life Practice: Grab your camera and set it to aperture priority mode (usually labeled as 'A' or 'Av' on the mode dial). Experiment by adjusting the aperture to see how it affects the depth of field in your photographs. Try capturing a portrait with a blurred background (using a larger aperture like f/1.8) and a landscape with everything in focus (using a smaller aperture like f/16).
2. Shutter Speed: Freezing or Blurring Motion
Shutter speed determines the amount of time the camera's sensor is exposed to light. A faster shutter speed freezes motion, while a slower shutter speed introduces motion blur. Keep in mind for slower shutter speed photography you'll want to equip a ND filter to help with the amount of light entering into the lens.
-
Real-life Practice: Switch to shutter priority mode (usually labeled as 'S' or 'Tv' on the mode dial). Experiment with different shutter speeds to capture moving subjects. Try photographing a flowing stream with a slow shutter speed (e.g., 1/30s) to create a silky smooth water effect or a moving car with a faster shutter speed (e.g., 1/500s) to freeze the action.
3. ISO: Sensitivity to Light
ISO measures the sensor's sensitivity to light. A lower ISO (e.g., ISO 100) is less sensitive and produces finer grain, while a higher ISO (e.g., ISO 1600 or above) is more sensitive and can introduce noise or graininess to the image.
-
Real-life Practice: Set your camera to manual mode and adjust the ISO while keeping the aperture and shutter speed constant. Capture images in different lighting conditions, such as a dimly lit room and a bright outdoor scene, to observe the impact of ISO on exposure and image quality.

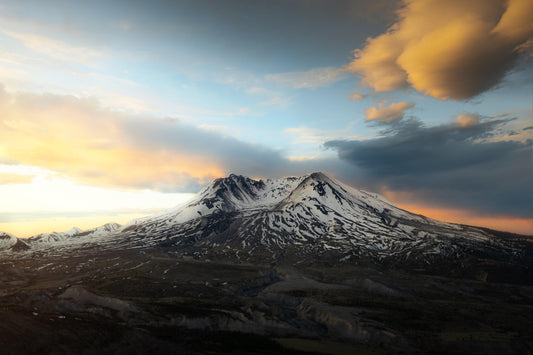
Question: In the photo above, did the photographer use a slow or fast shutter speed?
Putting It All Together
Mastering the Exposure Triangle requires practice, experimentation, and a keen eye for detail. By understanding the relationship between aperture, shutter speed, and ISO, you can confidently adjust your camera settings to achieve the desired exposure for any given scene.
-
Practical Tip: Consider using exposure compensation in situations where the camera's automatic metering may not produce the desired results. This allows you to manually adjust the exposure to capture the scene as you envision it.

Answer: Slow shutter speed. Using the slow shutter speed gave the desired results of a silky flow of the waterfall.
Conclusion
The Exposure Triangle is a fundamental concept in photography that empowers you to take control of your camera and unleash your creativity. By mastering the interplay between aperture, shutter speed, and ISO, you can capture stunning images that truly reflect your vision as a photographer. So grab your camera, venture outdoors, and start experimenting! If you'd like to continue on with section two head over here to learn about metering modes and histograms.